Eight Most Common Reasons that Your Dental Panoramic X-Ray Image Does Not Look Good (and How To Avoid Them)
The panoramic x-ray machine has become a staple of so many dental offices because of the amount of information it provides in such a short period of time with such little patient dosage. However, given the panoramic x-ray is so prevalent in dental offices, one would think that dental professionals would generally be able to routinely capture fantastic images with little effort.
Surprisingly, the dental panoramic x-ray is an intricate piece of equipment that requires a skilled and knowledgeable operator to maximize it’s diagnostic value. In fact, some studies have shown that only about 10% panoramic images captured are free of errors.
With these challenges in mind, ImageWorks wanted to create a practical guide to serve as a roadmap to help any panoramic x-ray user maximize the value of their piece of equipment. It’s worth noting that the images below are not from our equipment, and many of the them have multiple issues – but our intent is to highlight some of the most common problems we see.
Learn more about Panoramic X-Ray Machines from ImageWorks
Learn more about Cone Beam Machines from ImageWorks
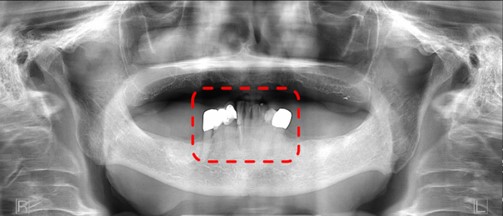
Dark area occluding maxillary apices
This is probably one of the most common problems we see with busy offices taking panoramic images. However, this symptom can be tricky to get rid of.
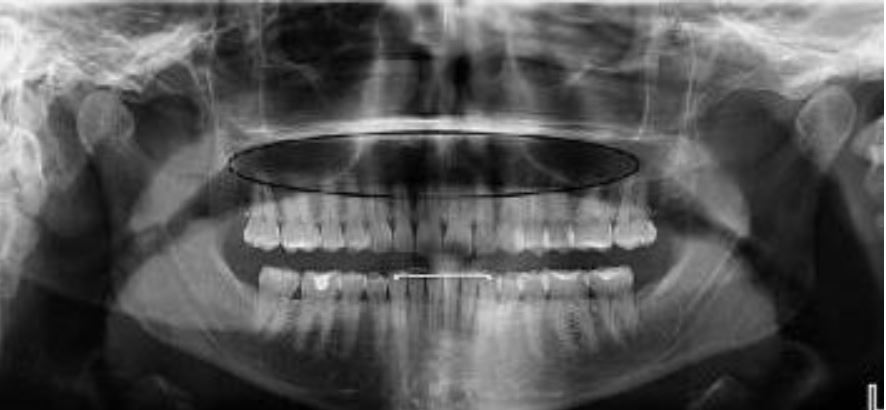 The most common root cause of this artifact is the patient failing to hold their tongue flat against the top of the hard palate. While most operators are aware of this recommended step, there are two additional lesser-known facts that may thwart dental professionals trying to remove this artifact from their images.
First, simply telling the patient to “put your tongue to the top of your mouth” may not solve this problem. The reason for this is that many patients may take this direction to mean they should simply touch the roof of their mouth with the tip of their tongue. This approach will not solve this problem because the goal is to remove the air gap between the tongue and the hard palate. Instead, we recommend that the operator should instruct the patient to “press the tongue flat against the roof”, which will better remove the air gap that can cause this artifact.
Another challenge for the office is that there is a very similar-looking artifact that may present for a completely different reason. If a large cross sectional area of the hard palate is between the x-ray source and the mandibular apices, this can absorb x-rays exposing this region, and can result in the dark artifact. This can be caused if the occlusion of the patient is “too flat”. The ideal approach to avoid this is to position the patient with a slight (~10 degree) downward tilt of the occlusal plane.
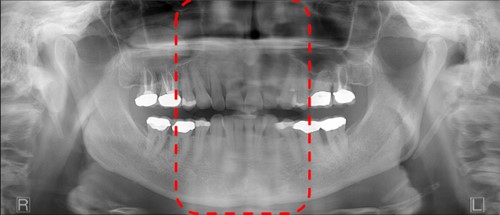
Cloudy artifact down the center of the radiograph
This artifact most commonly looks like a cloudy fuzz down the center of the panoramic radiograph.
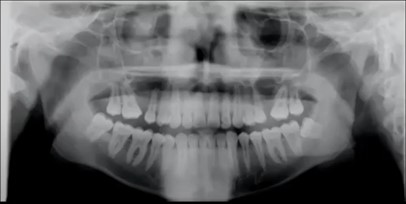
This is typically caused when the patient’s spine is “hunched”, or sometimes referred to as “goosenecked” vs. being erect or, even better, stretched.
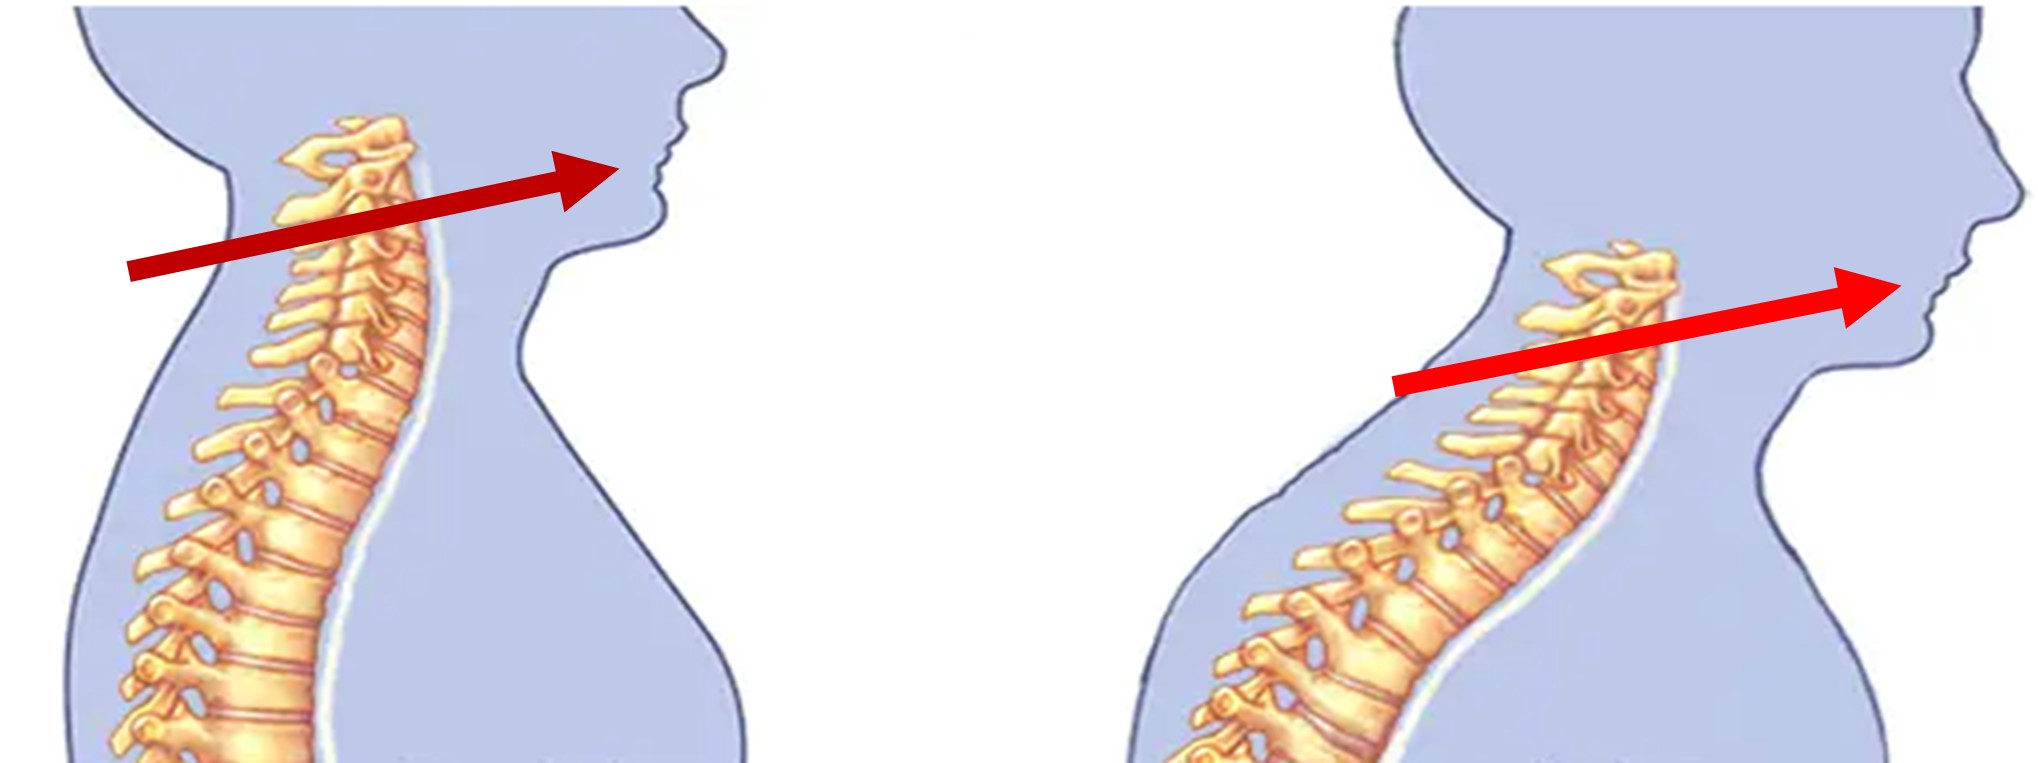
If the spine is hunched, it means the x-ray must travel through more bone before it reaches the anterior teeth which can result in much less energy to exposing this region of the anatomy. This can result in the cloudiness seen down the center of the radiograph.
The most effective technique to remove this artifact is to have the patient hold the grab bars on the unit and move their feet forward so that the patient is in a “leaning back” position. While this is the ideal approach, we also have seen that this can be easier said than done with some patients (e.g. an elderly patient that cannot hold themselves in this position, and may have an inherent hunch in their spine). Therefore, even if the patient cannot be positioned in this leaning back manner, simply helping the patient to stand as erect as possible will help reduce this anterior artifact.
Light triangular artifact at bottom center
If a panoramic image shows any solid white triangular shapes along the very bottom, this typically points to a lead apron that was captured in the scan.
This artifact is typically easily identified as a lead apron that either is draped too high on the back of the patient, or has a thyroid collar.
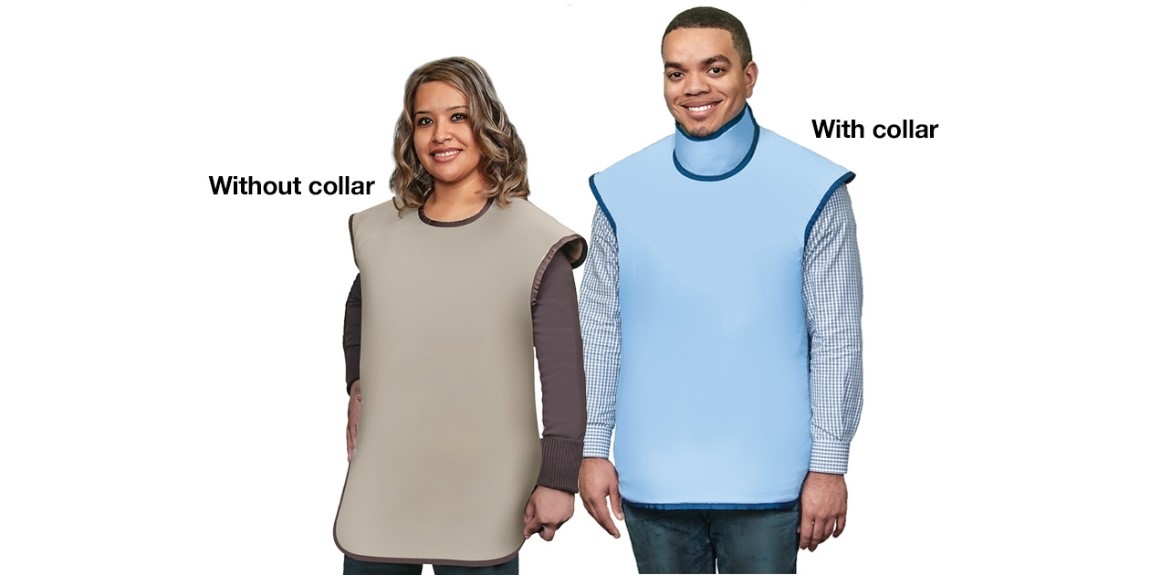
While this is relatively easily identifiable for most offices, what can be counterintuitive is that sometimes operators are surprised that a collar on the back of the neck would affect the scan. Therefore, it’s a worthwhile reminder that a panoramic x-ray originates behind and below the patient’s head – so any part of the lead apron that rises up the back of the neck could show up as an artifact in the image.
Sometimes an inexperienced operator may think that as long as the mandible is not covered by the apron, there will be no impact of the apron on the image. It is for this reason, it’s a great idea to remind the operator that the x-ray originates behind and below, with an upward trajectory.
Anteriors are blurry and narrow
There are a number of reasons that the anteriors may not look clear, but if they look very narrow, this typically points to the patient’s arch being positioned too far forward, or more precisely, the teeth are anterior to the focal plane where the panoramic beam is focused. Another hint of this scenario is when you also see a lot of spine along the sides.
In this scenario, there are a few things to check. First is to make sure the patient is biting in the groove of the bite stick provided with the unit. Second would be to double check the canine laser positioning on the patient.
Anteriors are blurry and wide
Conversely, if the patient’s arch is behind that focal plane, the opposite effect can be seen. The anteriors will look wide and distorted.
In this scenario, it’s also good to make sure the patient is biting in the groove of the bite stick provided with the unit, and as with the last scenario, it is worth double checking the canine laser positioning on the patient.
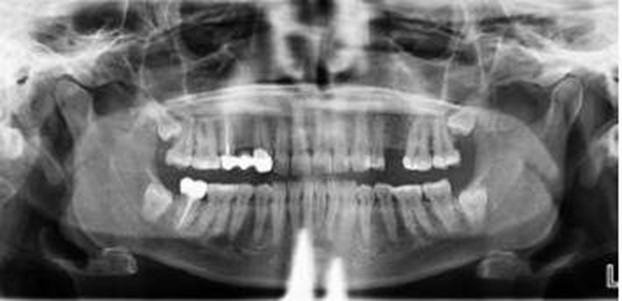
One side of the radiograph is magnified or elongated
If it appears that one side of the patient’s anatomy is stretched or distorted more than the other side, this can point to a patient whose head was not facing straight ahead.
While there are many issues with this image, you can see that one side the mandible is distorted and larger. The corrective action here is to make sure the patient is facing directly forward in the chinrest.
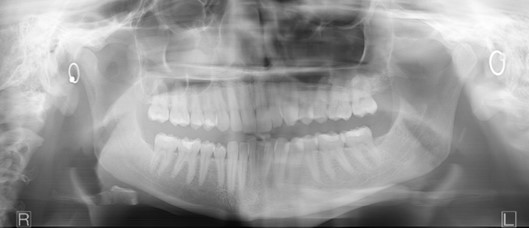
Jewelry
While most operators understand that jewelry should be removed. Sometimes, it’s not understood how much an earring can ruin the entire panoramic radiograph. This is because each earring will show up twice. Once, clearly in the expected location, but then again as a projection, or ghost artifact, typically in the upper posterior.
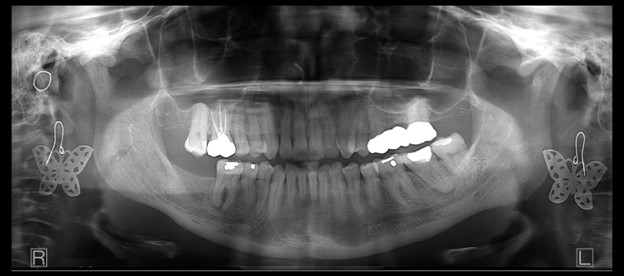
It is the projection artifact that may not be as obvious, but it can be damaging to the diagnostic value of the radiograph.
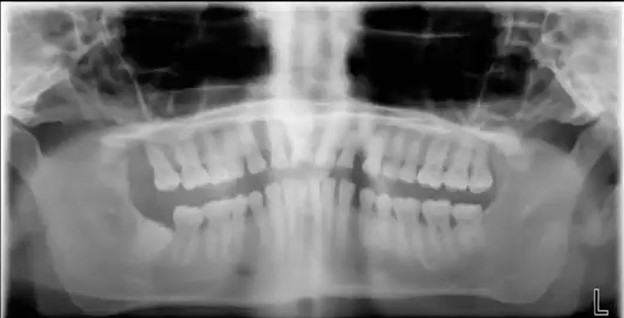
Chin too high or too low
These are also probably a little more obvious for the operator. The first shows the chin positioned too high and therefore, the occlusal plane is at too high of an angle.
Conversely, this patient has the chin too low such that the occlusal is pointing down.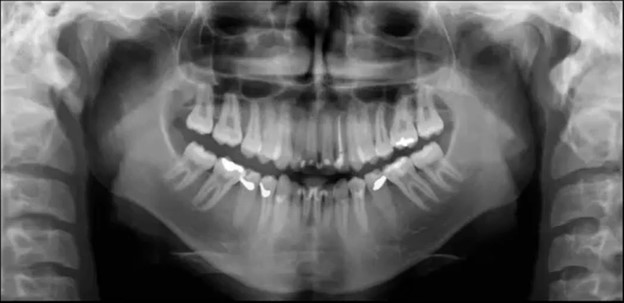
Addressing both of these issues comes down to making sure the occlusal plane is just slightly tipped (~10 degrees) downward. In our experience, we often find that the chin too far up is a more common error. One of the root causes of this is that sometimes the patient is simply nervous. A nervous patient may have a defensive posture that is trying to keep the rest of the body “out of the machine” – which can present as the chin jutting out and up.
To address this issue, there is the obvious technique of raising or lowering the chinrest on your panoramic x-ray and use the laser alignment system to double check this occlusal plane angle. However, another tip is to perform this check last before walking out of the room to initiate the scan.
One Parting Reminder
There is an often-overlooked step in the workflow to capture a panoramic radiograph that can dramatically reduce the frequency all of the problems discussed above: preparing the equipment and the software before bringing the patient over to the machine. By doing this, it allows the operator to focus on the patient, which reduces the probability that something is missed.
Subscribe to Receive More Great Articles