Imageworks Announces Partnership with The MOD Institute

ImageWorks Partners with The MOD Institute to Advance Clinical Education Using the Mielscope

ImageWorks announced a new partnership with the MOD Institute, a leading dental education and training organization, to integrate the Mielscope digital microscope into MOD’s hands-on training programs and clinical environment. As part of this collaboration, the Mielscope will give MOD clinicians and students unprecedented visibility into complex dental techniques while supporting modern ergonomic workflows.

“After using the Mielscope in both clinical and educational settings, it became clear that this technology offers something fundamentally different,” said Wally Renne DMD, Founder of the MOD Institute. “The ability to capture high-quality video from virtually any angle, while maintaining focus without losing productivity, creates a powerful teaching environment. It allows students and colleagues to see details that are often difficult to convey with traditional optics, and we’re excited to incorporate it into our programs.”

“Working with Wally and the MOD Institute is a natural fit,” said Don Vibbert, General Manager of ImageWorks North America. “MOD is known for its commitment to clinical excellence and practical education, and the Mielscope was designed to support exactly that kind of real-world learning. We’re proud to see the system being used by educators who are shaping the next generation of dentistry.”


About MOD Institute

The MOD Institute is a premier dental education organization focused on advanced clinical training, mentorship, and real-world application. Founded by Wally Renne, the institute combines hands-on instruction with modern techniques to help clinicians elevate their skills and outcomes in everyday practice.


About ImageWorks

ImageWorks is a U.S.-based dental imaging company specializing in advanced diagnostic and visualization technologies. Through partnerships with international manufacturers, ImageWorks brings innovative tools to North American dental professionals with a focus on clinical performance, education, and workflow efficiency.


State Shielding Studies Explained: How Technicians Can Help a Dentist Get Approved


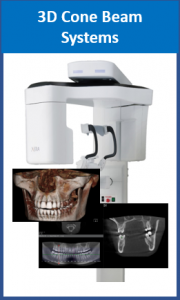
A shielding study is often one of the most confusing parts of setting up a cone beam system. Many dental offices do not understand the process, and equipment service technicians are often the first people they turn to for help.

When you can explain the shielding review process in plain language, what’s required, what’s optional, what drives recommendations, and what information really matters, you become more than “the repair person.” You become the person who helps the office avoid delays, cost surprises, and compliance headaches. Below are several commonly misunderstood facts that can help you guide your dental customers more confidently.


Some states require shielding studies, and some don’t

Shielding requirements are not uniform across the U.S. Some states require a shielding evaluation for dental CBCTs.  Some even require it for other modalities, like pan ceph systems as well. Even when a state doesn’t require a shielding study, there can still be value in doing one. As a technician, simply knowing whether a state is strict, moderate, or hands-off can help set expectations early, especially when timelines are tight.


Most states have approved physicists, and some vendors cover many states

In states that regulate shielding reviews, there’s often a list for qualified or approved radiation physicists to perform the evaluation. In addition, there are larger companies that operate across multiple states and handle shielding reviews as a routine service. For instance, Landauer is a larger company that can perform shield reviews nationally.


Shielding reviews focus heavily on employee safety, not just patient exposure

Most radiation physicists will request some kind of drawing not only of the room where the unit will be located, but also the surrounding area.  One of the items they are reviewing is whether there may be “stationary” employees located near the machine.  This can be counterintuitive to dental teams. Patients are absolutely important, but staff may be in or near the area all day, every day. For instance, a classic red-flag scenario is a dental cone beam in close proximity (e.g. on the other side of the wall) to the front desk.  The concern is that staff members may be located close to the unit all day, and they may not even know scans are happening.


The trigger switch location matters more than people expect

A shielding review often asks to identify on the drawing where the exposure switch or trigger will be located. The reason they look at this is to estimate where the operator stands during exposures, and therefore the likely long-term exposure profile for the person who runs the scans.


State rules exist, but the physicist’s judgment plays a big role

Even in regulated states, there can be gray area. Many shielding decisions involve professional judgment based on distance to occupied areas, expected workload, type of unit and scan protocols, and construction details like wall composition. The good news is that most radiation physicists are practical. They know dentists aren’t trying to build a hospital bunker, and they usually aim for recommendations that are feasible and cost-effective if they have good information to work with.


What’s above and below the room can play a role

A common question with shielding reviews is what’s above and below the imaging room. That’s because shielding isn’t only about what’s on the other side of the wall. Vertical adjacency matters too.

Examples that can change calculations include office space above or below with staff present all day, residential space above or below in a mixed-use building, or storage and mechanical spaces that typically have lower occupancy. If your customer is in a multi-tenant building, this topic alone can prevent major surprises.


Many shielding studies are done remotely, without a site visit

Another misconception is that the physicist must come onsite. Many evaluations can be completed remotely using room drawings or floor plans, dimensions and wall compositions, proposed equipment placement and orientation, and adjacency and occupancy information. Site visits do happen, especially for complex spaces, unclear construction, or post-install verification, but remote reviews are common and can be faster.


Shielding isn’t “lead or nothing.” Distance and materials matter

Lead is very good shielding material, but it’s not the only barrier that is available. Physicists typically account for existing drywall layers, distance and geometry to help ensure compliance.

For instance, distance can be a great protection because radiation intensity drops rapidly as you move away from the source. A simplified rule of thumb many people relate to is the inverse-square relationship, where doubling distance can reduce exposure to roughly one-quarter, depending on scatter conditions and layout. So yes, an operator 8 feet away receives dramatically less exposure than someone 1 foot away, even before you factor in walls or shielding.

The practical takeaway is that a good shielding review doesn’t always mean “add lead everywhere.” Sometimes the best fix is layout, operator position, or recognizing that existing construction already provides meaningful attenuation.


The physicist needs specific machine data, especially operating parameters and scatter information

For CBCT and other dental imaging systems, the shielding review typically requires details about the unit such as maximum kVp, maximum mA, and sometimes exposure time or duty cycle assumptions, plus workload estimates like scans per week or day, or orientation.

Many physicists also ask for manufacturer documentation describing scatter or radiation distribution around the unit. People often call this a scatter plot, although terminology can vary by manufacturer and physicist. The point is the same: the physicist needs a credible basis for how radiation propagates in the room so they can model exposure.


Moving equipment may trigger a new study, even within the same building

Some states require a new shielding evaluation when equipment is moved to a different room, the orientation changes significantly, adjacent occupancy changes, or sometimes even when the unit is relocated within the same facility. Offices are often surprised by this because it’s the same machine, but from a safety standpoint, the exposure environment can change completely based on layout and occupancy. 


Conclusion

Shielding reviews don’t have to be mysterious, and they’re rarely just “how much lead is in the wall.” They’re a practical risk assessment shaped by occupancy, distance, adjacent spaces, operator position, and machine parameters, all things you already think about when planning installs and service work.

When you can explain these realities to a dentist or office manager and help them gather the right info for the physicist, you’re saving them time, preventing delays, and reducing the chance of expensive last-minute construction changes.


About ImageWorks
ImageWorks provides imaging systems that deliver excellent image quality, competitive pricing, and dependable performance without the headaches. We help dental professionals and technicians install and use imaging equipment with confidence and simplicity.

Using CBCT Wisely: Key Takeaways from the ADA’s 2026 Guidance

The American Dental Association (ADA), in collaboration with the American Academy of Oral and Maxillofacial Radiology, released updated clinical recommendations in 2026 outlining when CBCT is indicated, when it may be helpful, and when it is not supported by current evidence. These recommendations emphasize patient-centered decision-making, radiation safety, and the importance of matching the imaging modality to the specific clinical question.

The infographic below is a visual summary of the ADA’s 2026 CBCT-specific recommendations, organized by dental specialty and common clinical scenarios. Rather than focusing on technology features, it highlights clinical decision points.  It identifies situations where CBCT may meaningfully impact diagnosis, risk assessment, or treatment planning, as well as scenarios where CBCT use is not recommended. By presenting this information in a side-by-side format, the graphic is designed to be easy to scan, quick to reference, and practical for everyday clinical discussions.

Key Takeaways from the ADA CBCT Guidance

  • CBCT is not a replacement for a thorough clinical examination or conventional radiography

  • Routine or screening use of CBCT is not supported

  • CBCT is most valuable in complex cases where 2D imaging is inconclusive

  • Indications vary significantly by specialty and clinical scenario

  • Imaging decisions should be based on whether the scan will change diagnosis, risk assessment, or treatment planning

About ImageWorks
ImageWorks delivers dental imaging systems that combine excellent image quality, fair pricing, and dependable performance. Our goal is to help dentists and technicians succeed with digital imaging and 3D workflows.

5 Ways the Mielscope Helps Dental Practices Make Money


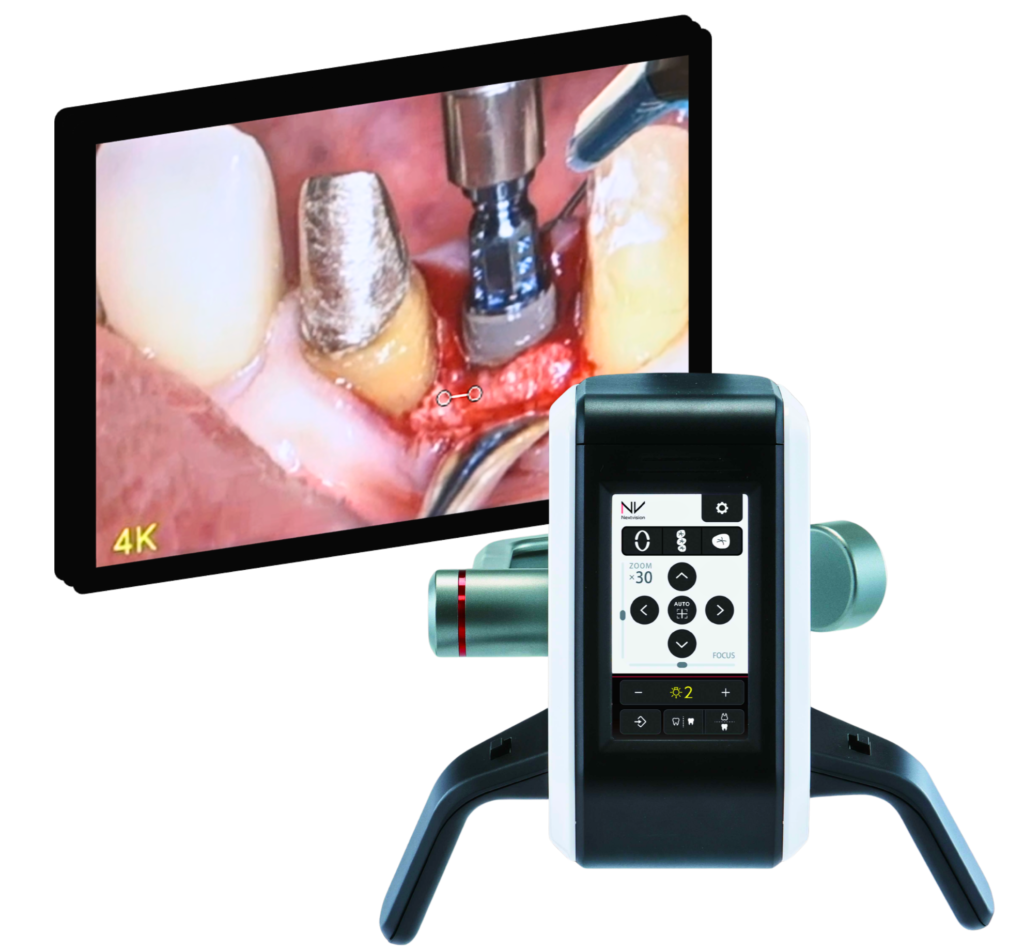
The Mielscope can make your dental practice more productive, persuasive, and profitable without adding complexity.  This innovative dental microscope system replaces outdated tools, captures powerful imagery, and enhances communication. It offers high-magnification visibility without causing neck strain or interrupting your clinical workflow.

Below are five compelling ways the Mielscope can help your practice save money or generate more revenue.


1. Increase Insurance Approvals with Visual Proof

Insurance denials can delay treatment, eat up valuable staff time and reduce reimbursement cash flow. The Mielscope lets your team quickly capture sharp 4K images and videos during procedures. These visuals can be attached to insurance claims along with real-time narration to support documentation.

This helps your team:

  • Justify procedures with visual evidence
  • Speed up approvals
  • Win more appeals
  • Spend less time fighting with insurance and more time focused on care

When insurance providers see exactly what you see, they are more likely to approve the claim.


2. Replace Multiple Devices and Save Thousands

Most practices invest in a dental lights, intraoral cameras, DSLR cameras, high-magnification loupes, and sometimes a traditional microscope. These tools add up in cost and complexity. The Mielscope consolidates all of these into one system.

By replacing multiple devices, you:

  • Cut equipment costs significantly
  • Eliminate the need to learn and maintain several systems
  • Improve your imaging and magnification with a single streamlined tool

The result is better quality with lower overhead.


3. Instantly Create Impactful Training Content In-House

Recording a procedure for training usually means added equipment and post-production time. With the Mielscope, you can narrate while recording and save the video immediately.  Automatically save your content to your cloud applications for organization and sharing.  No staff members to hold camera equipment.  No video production time to polish and edit video.

You can use these recordings to:

  • Train new assistants and hygienists
  • Document protocols and best practices
  • Educate your team and even host CE training content

You can easily build a video library that boosts your team’s confidence and skill level while adding real value to your practice operations.


4. Stay Focused with Hands-Free Controls

Advanced technology often slows dentists down when it requires frequent stops or manual adjustments. The Mielscope solves this problem with foot pedals that allow you to zoom, capture images, and record video without setting down your instruments.

This feature helps you:

  • Stay sterile throughout the procedure
  • Maintain full concentration on the patient
  • Complete procedures faster and more efficiently

Hands-free operation protects your workflow and boosts productivity.


5. Show Patients Imagery That Drives Acceptance

Most patients find intraoral camera images hard to interpret. The Mielscope delivers dramatic, high-definition video and images that patients can easily understand. They can see cavities, cracks, and inflammation clearly and up close.

This makes it easier to:

  • Explain conditions visually
  • Build patient trust
  • Increase case acceptance

When patients see what you see, they are more likely to move forward with treatment.


About ImageWorks
ImageWorks delivers dental imaging systems that combine excellent image quality, fair pricing, and dependable performance. Our goal is to help dentists and technicians succeed with digital imaging and 3D workflows.

DICOM vs. STL in 3D Dental Imaging: Technician Workflow Guide

Digital dentistry relies heavily on two types of 3D data files, but many dental offices do not fully understand the difference. For technicians, knowing how DICOM and STL files work makes you a valuable resource when dentists run into data workflow challenges.

DICOM files come from cone beam scanners and represent internal anatomy in a medical grade format. A cone beam scan is made of hundreds of thin slices that together create a full three dimensional volume. DICOM files also include scanner settings, exposure details, and patient information that helps maintain consistency.

STL files come from intraoral scanners and represent the surface of the teeth and gums. These files are made of thousands of tiny triangles that together form a detailed mesh. STL files do not contain internal anatomy, nerves, or bone structure, but they are essential for CAD CAM design and 3D printing.

Dentists often use both file types in implant planning because together they provide a complete picture. The cone beam DICOM shows the bone and critical structures, while the STL shows the teeth and soft tissue. Aligning them correctly is the foundation of guided surgery.

Technicians often help offices when these files fail to merge correctly. The most common problems include missing data in the scan, mismatched identifiers, or incompatible software. Encouraging dentists to maintain consistent file naming and verify patient data helps prevent confusion.

Not all software uses the same formats. Some accept STL only, while others support OBJ or PLY. Understanding the various file types allows you to guide dentists to the correct settings.

Technicians can also help dentists understand that STL files do not replace DICOM files. STL provides only the outer surface, so it cannot show bone quality or internal structures. Both are needed for complete accuracy.

Supporting offices as they learn to work with these formats elevates your role. You become a workflow expert instead of just a hardware technician, and offices appreciate the guidance as they adopt new digital tools.

As dentistry continues moving toward surgical guides, in house printing, and digital restorative workflows, understanding these file formats becomes more important than ever.

About ImageWorks
ImageWorks delivers dental imaging systems that combine excellent image quality, fair pricing, and dependable performance. Our goal is to help dentists and technicians succeed with digital imaging and 3D workflows.

CBCT vs. Panoramic X Ray: Compliance Differences Explained

Many dental offices think a cone beam installation is similar to a panoramic installation. For installation technicians, the reality is quite different. The regulatory details, shielding expectations, and paperwork can be more involved with cone beam systems. For a dental service technician, understanding these differences obviously ensures smooth installations.  However, even if you weren’t involved in the cone beam install, you may be able to add value by advising the office on how to stay compliant.

Shielding requirements can be a major difference between the two systems. A panoramic uses a narrow X ray beam, while a cone beam creates a much wider exposure field. Because of this, many states require a shielding evaluation from a certified medical physicist before the cone beam is installed.  For a new installation, if the office has not begun this process, a technician can save them time by encouraging them to start early.  For an existing cone beam, a technician may help the office avoid fines simply by asking if this step has been completed.

If the state requires a shielding evaluation, the physicist will typically need (among other information) scatter data from the manufacturer, and some type of drawing of the office.  The physicist will prepare feedback on layout and shielding based on potential exposure concerns in the office.  One of the primary items the physicist is looking for is employee exposure, as they are in the office everyday.  For instance, if the front desk is right on the other side of the wall that the cone beam is attached to, the physicist may request alternative layouts, additional shielding, or both.

Documentation plays an important role in installation success. Every new X ray or cone beam installation requires an FDA 2579 form that certifies the device has been assembled according to manufacturer specifications. The installer must complete and distribute copies to the FDA, the state, the dentist, and their own records.

State registration rules may also differ between two dimensional systems and cone beam systems. Some states require separate registration for three dimensional equipment even if the dentist already uses panoramic or intraoral X rays. Keeping a reference sheet can help a technician give accurate guidance.

Once the cone beam is mounted, the physicist will often perform acceptance testing. This includes verification of geometric accuracy, exposure consistency, detector calibration, and reconstruction quality. Being prepared for these checks helps reduce the risk of inspection delays.

Network performance and computer capabilities also matter more for cone beam than for panoramic imaging. Cone beam scans create large files that require fast processing, sufficient RAM, and strong network speed. Confirming PC specifications before installation prevents performance complaints later.

When technicians take time to explain these details to dentists, it builds trust. Offices appreciate when you help them avoid delays and when you anticipate compliance needs instead of reacting to problems.

Ultimately, cone beam installation success comes down to preparation, communication, and a detailed understanding of compliance rules.  However, even if the unit was installed some time ago, dentists will remember the technicians who offer consultative expertise to make sure not only the install, but also the lifetime operation smooth and stress free.

About ImageWorks
ImageWorks provides imaging systems that deliver excellent image quality, competitive pricing, and dependable performance without the headaches. We help dental professionals and technicians install and use imaging equipment with confidence and simplicity.

Dr. Shao Shares The Capabilities He Values Most in His Mielscope

Dr. Steven Shao has a thriving general practice in southern California.  He provides an overview of the Mielscope capabilities that he finds most valuable.


Take the first step toward better images


    Or give us a call:  914-592-6100


    Voxel Size in Dental CBCT: What Every Technician Should Know

    Voxel size might sound like a small technical detail, but it plays a big role in how dentists interpret cone beam scans. As a technician, understanding what voxel size is, and how it affects image clarity and radiation dose, can help you explain system settings, troubleshoot quality issues, and guide dentists toward better diagnostic results.


    What Is a Voxel?

    A voxel (short for volumetric pixel) is the 3D equivalent of a pixel on a flat image. In a CBCT scan, each voxel represents a tiny cube of data containing information about density. Smaller voxels mean finer detail, but it can also mean larger file sizes, longer scan times, and higher radiation exposure.


    Why Voxel Size Matters

    Voxel size determines how sharp the scan looks and how accurately anatomy can be measured. For implant planning or endodontics, high-resolution scans (around 0.1–0.15 mm) reveal fine details like canal morphology or thin cortical bone. For airway assessments or orthodontic planning, larger voxels (0.3–0.4 mm) are often sufficient and reduce dose.


    How the Setting Affects Dose and Noise

    Smaller voxels require more X-ray photons to maintain image quality, which increases patient dose. Conversely, larger voxels lower the dose but introduce more image noise. Helping dentists balance clarity with exposure is part of the technician’s advisory role.


    Field of View Connection

    Voxel size is tied to the field of view (FOV). When the FOV increases, the voxel size typically grows too. If a dentist wants both a large scan area and fine detail, it’s worth explaining the trade-offs:  bigger scans mean more dose and longer reconstruction times.


    Common Mistakes

    Sometimes, dentists unknowingly use too small a voxel for routine cases, slowing workflow and filling hard drives with unnecessarily large files. Other times, they choose a large voxel and complain about blurry images. A quick technician-led review of presets can solve both issues.


    System Capabilities

    Not all CBCT units achieve the same voxel ranges. Some systems are optimized for small fields and fine detail, others for versatility and dose efficiency. Knowing the specific voxel settings of the system you support helps you make accurate recommendations.


    Calibration and Software Impact

    Even if voxel size is set correctly, calibration and reconstruction filters influence apparent sharpness. Flat-field calibration errors or outdated reconstruction algorithms can make a 0.125 mm scan look like a 0.3 mm scan. Periodic software updates maintain true resolution.


    Communicating With Dentists

    When a dentist says, “My scans don’t look as crisp as before,” you can ask: “What field of view are you using?” Educating them on this simple concept often solves misunderstandings without a service call.


    Example Scenario

    A practice scanning for endodontics at 0.4 mm voxels might miss a fine crack; switching to 0.125 mm reveals it clearly. On the other hand, using 0.125 mm for every patient may triple scan time and data storage. Context is key.


    Conclusion

    Voxel size sits at the crossroads of quality, dose, and efficiency. Helping dental teams understand its impact not only reduces complaints but also reinforces your credibility as the technical authority behind their imaging success.


    About ImageWorks

    At ImageWorks, we believe dentists deserve imaging technology that delivers exceptional image quality, great pricing, and dependable performance. Our panoramic, cone beam, and intraoral imaging systems are designed to provide crystal-clear diagnostics while keeping ownership simple and affordable.

    Troubleshooting CBCT and Panoramic Image Quality: A Technician’s Guide

    Intro

    When a dentist calls saying their cone beam images look “grainy,” “blurry,” or “just not like they used to,” the issue often lands on the technician’s desk. Cone beam CT (CBCT) systems are remarkably precise, but small changes in setup, maintenance, or environment can quickly degrade image quality. Understanding how to identify and correct these problems not only helps your clients, but it also builds trust and positions you as an imaging expert.


    Why CBCT Image Quality Matters

    A CBCT’s value lies in its ability to reveal fine anatomical details. Poor image quality can obscure canals, bone defects, or implant paths, leading to frustration for dentists and re-scans for patients. For technicians, consistent quality is proof that the system is properly calibrated and maintained.


    The Usual Suspects

    Common image issues stem from three categories: technique, environment, and hardware/software.
    Before opening a service ticket or swapping parts, it’s smart to rule out technique first.  Many “machine problems” start with how the scan is taken.


    Patient Positioning Errors

    Even a few millimeters of misalignment can distort anatomy. If the patient’s chin is too high or low, or the head isn’t centered, shadows and elongation appear. Encourage your dental teams to use laser alignment guides and verify that the Frankfurt plane is level before exposure.


    Motion Artifacts

    Patients sometimes move during the 10–20-second rotation. The result is a double-image effect resembling ghosting or streaks. If this happens, confirm that the seat or chin rest is secure, and check whether the exposure time can be shortened or the scan mode adjusted.


    Exposure Settings and Protocols

    Underexposure causes noisy, gray images; overexposure washes out contrast. Remind operators that patient size and region of interest matter. Most systems allow preset protocols (small, medium, large adult). Ensuring these are correctly chosen prevents repeat scans and excess dose.


    Environmental Factors

    Ambient temperature and electrical stability influence sensitive imaging components. Fluctuating voltage can create line artifacts or intermittent detector errors. Recommend dedicated power circuits with surge suppression and, ideally, voltage regulation for CBCT units.


    Detector and Flat-Field Calibration

    Digital detectors age over time. Regular flat-field calibration ensures uniform response across the panel. If you see vertical banding, dead pixels, or brightness gradients, schedule a calibration or check for issues with the detector.


    Tubehead and Generator Health

    If artifacts persist after calibration, inspect tube output consistency. A weakening X-ray tube or unstable generator can cause subtle exposure drift. Reviewing exposure logs and measuring mA/kV stability can reveal early signs of failure before total shutdown.


    Software Reconstruction Settings

    Occasionally, the issue lies in reconstruction parameters. Verify that the system’s reconstruction filters match the scan protocol. Updating or reinstalling reconstruction software can also resolve artifacts that appear after software crashes or power interruptions.


    Service Documentation and Preventive Maintenance

    Document every adjustment, calibration, or environmental change. Maintaining a detailed service log helps correlate image issues with events like electrical outages or room remodels. Preventive maintenance visits, like checking motion bearings, filters, fans, and grounding, can reduce emergency calls later.


    Educating the Dental Team

    Technicians who explain why quality issues occur strengthen relationships. Providing quick-reference guides for common image errors empowers staff to self-correct minor issues, keeping their system performing optimally and you top of mind for future upgrades.


    Conclusion

    CBCT image quality problems rarely stem from a single cause. A structured troubleshooting process including technique first, then environment, then hardware can saves time and reinforces your role as the expert keeping the office’s imaging dependable and compliant. Great imaging equals happy dentists, fewer retakes, and stronger service partnerships.


    About ImageWorks

    At ImageWorks, we believe dentists deserve imaging technology that delivers exceptional image quality, great pricing, and dependable performance. Our panoramic, cone beam, and intraoral imaging systems are designed to give you crystal-clear diagnostics while keeping ownership simple and affordable.

    FDA 2579 Form: What It Is, Why It Matters, and How to Stay Compliant

    It’s a scenario that plays out in dental offices more often than you’d think. A physicist or inspector arrives to evaluate your X-ray system, looks around, and suddenly asks, “Can I see your FDA Form 2579?”

    You search your files and wonder where it’s supposed to be—or what it even is. The initials “FDA” alone are enough to cause a ripple of anxiety, but in reality, the situation is easy to resolve once you understand what the form is, why it exists, and how it fits into your office’s compliance obligations.

    Let’s break down what every dental professional should know about the FDA 2579 form—how to get it, what it verifies, and why keeping it on file is essential for your practice.


    What Is the FDA 2579 Form?

    The FDA 2579 form is officially titled the Report of Assembly of a Diagnostic X-Ray System. It’s required under federal law by the U.S. Food and Drug Administration (FDA)—specifically, by the Center for Devices and Radiological Health (CDRH).

    In plain terms, the form documents that any X-ray–emitting equipment in your facility—such as a panoramic X-ray, cone beam CT (CBCT), or intraoral system—was installed according to the manufacturer’s specifications and is operating safely.

    Whenever a new X-ray system or a major component is installed, repaired, or upgraded, the installing engineer (referred to by the FDA as the “assembler”) must complete and submit this form. By signing it, the assembler certifies that:

    • The equipment was assembled per manufacturer guidelines.

    • All safety features, such as exposure controls, warning lights, and shielding, were installed and tested.

    • The system meets federal radiation safety performance standards.

    This form is part of the FDA’s effort to ensure patient and operator safety under the Radiation Control for Health and Safety Act of 1968.


    When Is a 2579 Required?

    It’s not only for brand-new system installations. A 2579 must also be completed any time an X-ray–emitting component is replaced or added, including:

    • Tubehead replacements or generator swaps

    • Major control board or power supply replacements

    • Digital detector or sensor upgrades

    • Field conversions (for example, upgrading a panoramic to a cone beam unit)

    In short, any assembly that could affect radiation output or performance requires a new form.


    Who Fills Out the Form?

    The form must be completed and signed by the installer or service engineer who assembled or reassembled the device. In most states, that individual must also be registered or licensed with the state’s radiological health department.

    Reputable manufacturers and service providers—such as your dental imaging supplier—should always provide and file this form as part of every installation or major service event. If an installer seems unfamiliar with it, that’s a red flag that they may not be authorized to perform X-ray work in your state.


    How the 2579 Is Filed and Distributed

    Once completed, the form is distributed in four color-coded copies:

    • White (Original): Sent to the FDA

    • Yellow: Sent to the state’s radiological health department

    • Pink: Left onsite with the dental practice (your copy)

    • Blue: Retained by the installer

    Each form carries a unique serial number tied to your specific installation and cannot be reused. The pink copy should be filed in your office’s compliance or equipment records, ideally alongside your physicist’s shielding report and any local radiation registration documents.


    Where to Get the FDA 2579 Form

    Your installer should always bring the form when setting up or upgrading your imaging system. However, if they do not have one—or you need a replacement—you can request it directly from the FDA:

    👉 FDA Request for 2579 Forms: https://www.fda.gov/radiation-emitting-products

    Many imaging manufacturers and distributors (including ImageWorks) can also provide blank forms and guidance if needed.


    Why You Must Keep a Copy Onsite

    There are three key reasons every dental office should keep its 2579 readily available:

    1. It’s a legal requirement.
      Federal and state regulations mandate that the form be completed and accessible for inspection.

    2. It’s proof of compliance.
      During accreditation reviews or inspections, physicists and health department officials often request to see your 2579. Having it ready demonstrates that your imaging systems were installed properly.

    3. It protects your practice.
      If an incident ever occurs involving an X-ray system—such as an injury or a malfunction—the 2579 provides official documentation that your equipment was installed according to specifications.


    Staying Audit-Ready

    A good best practice is to maintain an “Imaging Compliance Binder” that includes:

    • The FDA 2579 form(s) for each imaging system

    • The most recent shielding design and physicist report

    • State registration or radiation license documentation

    • Any service records or upgrade forms that affected X-ray components

    Keeping these records organized makes inspections straightforward and shows that your office takes radiation safety seriously.


    Partnering With the Right Installer

    Because the 2579 form reflects both installation quality and regulatory compliance, it’s critical to work with installers who understand and follow these standards. A qualified dental imaging partner will:

    • Handle the 2579 form automatically as part of every installation.

    • Ensure that all radiation-emitting components are properly registered with your state.

    • Provide support if your physicist or inspector ever requests documentation.

    If your vendor can’t provide a copy of your 2579, or if you’re unsure whether a recent upgrade was documented, contact them—or your state radiological health department—to confirm.


    Conclusion

    The FDA 2579 form may seem like a small piece of paperwork, but it plays a crucial role in ensuring that your imaging systems are safe, compliant, and properly documented. Understanding what it is—and keeping your copy on file—protects your patients, your team, and your practice.

    When it comes to compliance, preparation is the best form of protection.


    About ImageWorks

    At ImageWorks, we believe dentists deserve imaging technology that delivers exceptional image quality, fair pricing, and dependable performance—without the headaches. Our panoramic, cone beam, and intraoral imaging systems are designed to give you crystal-clear diagnostics while keeping ownership simple and affordable.