The Most Expensive Pitfall When Buying a Used Pano or Cone Beam


At ImageWorks, we have been helping dental professionals make the most of their dental imaging systems for decades, and our dental panoramic x-rays and cone beam systems last a long time.  As a result, we have seen many second and third owners enjoy our systems for years.  However, over the years, we have seen many mistakes by buyers and sellers that in some cases result in the office spending more money than they expected. 

The price point of a used pano or cone beam system is typically enticing.  If you decide that the risk is worth the savings for your office, make sure you go in eyes wide open and ask about a commonly overlooked component in this transaction.

We already assume you will ask about the warranty coverage, the training, the support, the history of the unit, and whether parts are still available.  However, the one item that many times gets overlooked is the acquisition PC.

Most dental panoramic x-rays and cone beam systems require an acquisition PC.  This PC typically will not only control the equipment, but it will also be responsible for communicating with rest of the office network (usually via the office imaging software). 

For older pieces of equipment, this dual-role of the acquisition PC can become more challenging because it requires the appropriate hardware and software to run the older unit.  However, it also may need to be able to run current versions of your practice software.

Given this background, the obvious first question to ask is whether the unit comes with the PC that it was last used with.  We have come across situations where a doctor buys a used unit, and it shows up without a PC.  Then the doctor learns that they cannot just purchase a PC off the shelf that will run the unit – and they need to scramble to come up with a solution.

The second, less obvious concern is whether the PC being provided is a Windows 10 or 11 operating system (there would comparable iOS versions if you are a Mac office).  There are a few reasons why this may cause a concern. 

First, Windows 7 (or earlier) is technically not HIPPA compliant. 

Second, using a Windows 7 PC in your office may create additional integration concerns.  For instance, your practice management version may not be able to operate on Windows 7.  Alternatively, perhaps your practice management can work on Windows 7, but this would require all PCs in your office to be “downgraded” – because they all need to be at the same version. 

Third, it’s possible that the used unit you are purchasing can only operate on Windows 7, and attempting to use it with Windows 10 is either not possible, or would require new software from the manufacturer.

A used pano or cone beam system can be alluring based on the price point.  You just want to make sure you fully understand the risks.  If you would like to get our specialist’s opinion of a used unit you are considering – we would be happy to arm you with the right questions to ask.


Subscribe to Receive More Great Articles

    Important Overlooked Questions When Buying a Dental Pan Ceph Machine

    A dental panoramic x-ray machine with cephalometric (sometimes referred to as a dental pan ceph machine) is an essential imaging tool for dentists.  This piece of equipment performs two main functions.

    First, it operates as a traditional dental panoramic x-ray machine that creates a panoramic radiograph.  This is used by the dentist for general exams, as well as third molar, pediatric and extraoral bitewing exams. 

    Second, it also allows the dental professional to perform frontal and lateral cephalometric exams.  These exams are typically used for orthodontic care.  However, they are also used for other evaluations like airway,  trauma and overall facial or oral development.

    Many dental professionals understand the more obvious questions to ask when purchasing any large piece of equipment, like those having to do with support, training, warranty, etc.  However, at ImageWorks, we’ve been providing advanced dental digital x-ray solutions for thousands of offices, and we thought it would be worth sharing some commonly overlooked questions that are really important in selecting the right dental pan ceph x-ray machine. 

    Cephalometric x-ray images are most commonly needed for orthodontic treatment.  However, they can also be used for TMJ assessment, sinus evaluation and trauma to the jaw or skull.  A cephalometric scan captures both lateral and poster-anterior (PA) images of the entire skull, and these scans are most commonly used as part of orthodontic treatment to measure relative movement of anatomical landmarks. 

    A somewhat unique characteristic that many dental professionals look for in their cephalometric images is the ability to see soft tissue.  Specifically, they use the image to review the relationship a patient’s jaws and teeth have to their soft tissues and the entirety of their skull.


    How does the pan ceph x-ray machine differ from a dental pan-only machine or a dental CBCT without ceph?

    Most cephalometric x-ray machines are combined with traditional dental panoramic x-ray machines, so the machine you purchase will perform both functions.  Cephalometric capability can also typically be added to most dental cone beam machines.  
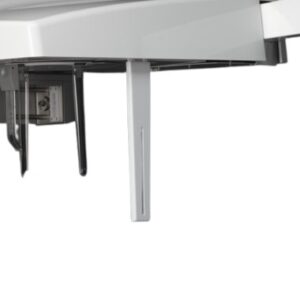
Typically, the way you can tell that any panoramic x-ray or dental cone beam machine can capture cephalometric x-rays is if the unit has an arm sticking out to the side.

    The purpose of this arm is to create distance between the source of the x-ray and the anatomy so that the field of view presented in the image is larger.  This is similar to a flashlight that faces a wall.  As you move the flashlight away from the wall, the circle of light gets bigger.  The patient is positioned at the end of the arm to capture the cephalometric image.  The industry standard is that the midsagittal of the patient should be 5 ft from the x-ray source, so the ceph arm will be designed to achieve this.


    How good is the pan ceph sensor?

    As with dental panoramic x-ray machines, not all systems have the same quality sensors, and the quality of the sensor is a big driver in determining the quality of the images that your machine will produce.  Most panoramic and cephalometric sensors today are CMOS design.  However, these CMOS sensors typically fall into two basic categories:  direct conversion sensors and indirect conversion sensors. 

    The main difference is that direct conversion sensors use a more expensive material that reduces noise in the signal.  As a result, a direct conversion sensor typically is a more expensive component.  However, it creates clearer images. 

    While the enhanced imaging of a direct conversion sensor has an impact with pan-only x-ray machines, it can be more pivotal for a ceph x-ray machine, because soft tissue landmarks are so important for orthodontic applications of cephalometric images.


    Will it integrate with my software?

    Currently almost all dental imaging hardware and software is very plug and play when it comes to integration.  Almost all dental pan ceph x-ray machines can communicate using the TWAIN standard, and almost all software platforms can accept images from TWAIN devices. 

    However, one additional configuration that many offices like to have with a dental ceph x-ray machine is that they may have two different software platforms involved.  They may have their general imaging software, but they may also utilize orthodontic planning software (sometimes referred to as tracing software).  In these situations, they may value a system that can acquire the cephalometric images directly into their tracing program, while acquiring their panoramic images into their general imaging software.


    Does the pan ceph equipment have one sensor or two?

    In order for a dental ceph x-ray machine to also perform panoramic scans, the machine must be able to capture images in two different locations:  the panoramic scan is typically done when the patient is standing near the column (close to the x-ray source), and the cephalometric scan when the patient is standing at the end of the cephalometric arm (farther from the x-ray source). 

    In each of these scenarios, a sensor must be located near the patient to capture the image.  This creates a challenge for a manufacturer, because typically the sensor is at the heart of the quality of the system, and therefore is one of the more expensive components – so having two sensors can make the system cost too high.

    So dental manufacturers typically solve this problem in one of two ways:  either the equipment has a lower-resolution, cheaper sensor in both the panoramic image location and the cephalometric image location (two sensors), or it has a single higher-resolution sensor that can be moved between the different positions.  As technology has advanced, the mechanisms in single sensor platforms to move the sensor have become so easy to use and mistake-proof, this has become a common design to get the best of both worlds:  maximizing image quality while still being easy to use.


    Are ceph images captured with a scan or with a single exposure?

    Most dental cephalometric x-ray machines capture the cephalometric image by performing a quick scan: usually 6-10 seconds.  However, one variation of the two-sensor design mentioned above is to utilize a larger “flat-panel” style sensor at the end of the arm for cephalometric images.  The main advantage of this style is that instead of a scan, the cephalometric image is captured with a single exposure.


    We hope you find this useful.  If you have any questions or would like to speak with a specialist to find the right fit for your practice, click below.  We would love to talk to you!


    Subscribe to Receive More Great Articles

      The Eight Most Common Reasons that Your Dental Panoramic X-Ray Image Does Not Look Good (and How To Avoid Them)

      Eight Most Common Reasons that Your Dental Panoramic X-Ray Image Does Not Look Good (and How To Avoid Them)


      The panoramic x-ray machine has become a staple of so many dental offices because of the amount of information it provides in such a short period of time with such little patient dosage.  However, given the panoramic x-ray is so prevalent in dental offices, one would think that dental professionals would generally be able to routinely capture fantastic images with little effort.

      Surprisingly, the dental panoramic x-ray is an intricate piece of equipment that requires a skilled and knowledgeable operator to maximize it’s diagnostic value.  In fact, some studies have shown that only about 10% panoramic images captured are free of errors.

      With these challenges in mind, ImageWorks wanted to create a practical guide to serve as a roadmap to help any panoramic x-ray user maximize the value of their piece of equipment.   It’s worth noting that the images below are not from our equipment, and many of the them have multiple issues – but our intent is to highlight some of the most common problems we see.  

      Learn more about Panoramic X-Ray Machines from ImageWorks

      Learn more about Cone Beam Machines from ImageWorks

      Dark area occluding maxillary apices

      This is probably one of the most common problems we see with busy offices taking panoramic images.  However, this symptom can be tricky to get rid of. 


      The most common root cause of this artifact is the patient failing to hold their tongue flat against the top of the hard palate.  While most operators are aware of this recommended step, there are two additional lesser-known facts that may thwart dental professionals trying to remove this artifact from their images.

      First, simply telling the patient to “put your tongue to the top of your mouth” may not solve this problem.  The reason for this is that many patients may take this direction to mean they should simply touch the roof of their mouth with the tip of their tongue.  This approach will not solve this problem because the goal is to remove the air gap between the tongue and the hard palate.  Instead, we recommend that the operator should instruct the patient to “press the tongue flat against the roof”, which will better remove the air gap that can cause this artifact.

      Another challenge for the office is that there is a very similar-looking artifact that may present for a completely different reason.  If a large cross sectional area of the hard palate is between the x-ray source and the mandibular apices, this can absorb x-rays exposing this region, and can result in the dark artifact.  This can be caused if the occlusion of the patient is “too flat”.  The ideal approach to avoid this is to position the patient with a slight (~10 degree) downward tilt of the occlusal plane.


      Cloudy artifact down the center of the radiograph

      This artifact most commonly looks like a cloudy fuzz down the center of the panoramic radiograph. 

      This is typically caused when the patient’s spine is “hunched”, or sometimes referred to as “goosenecked” vs. being erect or, even better, stretched. 

      If the spine is hunched, it means the x-ray must travel through more bone before it reaches the anterior teeth which can result in much less energy to exposing this region of the anatomy.   This can result in the cloudiness seen down the center of the radiograph.

      The most effective technique to remove this artifact is to have the patient hold the grab bars on the unit and move their feet forward so that the patient is in a “leaning back” position.  While this is the ideal approach, we also have seen that this can be easier said than done with some  patients (e.g. an elderly patient that cannot hold themselves in this position, and may have an inherent hunch in their spine).  Therefore, even if the patient cannot be positioned in this leaning back manner, simply helping the patient to stand as erect as possible will help reduce this anterior artifact.


      Light triangular artifact at bottom center

      If a panoramic image shows any solid white triangular shapes along the very bottom, this typically points to a lead apron that was captured in the scan. 

      This artifact is typically easily identified as a lead apron that either is draped too high on the back of the patient, or has a thyroid collar. 

      While this is relatively easily identifiable for most offices, what can be counterintuitive is that sometimes operators are surprised that a collar on the back of the neck would affect the scan.  Therefore, it’s a worthwhile reminder that a panoramic x-ray originates behind and below the patient’s head – so any part of the lead apron that rises up the back of the neck could show up as an artifact in the image. 

      Sometimes an inexperienced operator may think that as long as the mandible is not covered by the apron, there will be no impact of the apron on the image.  It is for this reason, it’s a great idea to remind the operator that the x-ray originates behind and below, with an upward trajectory.  


      Anteriors are blurry and narrow

      There are a number of reasons that the anteriors may not look clear, but if they look very narrow, this typically points to the patient’s arch being positioned too far forward, or more precisely, the teeth are anterior to the focal plane where the panoramic beam is focused.  Another hint of this scenario is when you also see a lot of spine along the sides.

      In this scenario, there are a few things to check.  First is to make sure the patient is biting in the groove of the bite stick provided with the unit.  Second would be to double check the canine laser positioning on the patient.


      Anteriors are blurry and wide

      Conversely, if the patient’s arch is behind that focal plane, the opposite effect can be seen.  The anteriors will look wide and distorted. 

      In this scenario, it’s also good to make sure the patient is biting in the groove of the bite stick provided with the unit, and as with the last scenario, it is worth double checking the canine laser positioning on the patient.


      One side of the radiograph is magnified or elongated

      If it appears that one side of the patient’s anatomy is stretched or distorted more than the other side, this can point to a patient whose head was not facing straight ahead. 

      While there are many issues with this image, you can see that one side the mandible is distorted and larger.  The corrective action here is to make sure the patient is facing directly forward in the chinrest.


      Jewelry

      While most operators understand that jewelry should be removed.  Sometimes, it’s not understood how much an earring can ruin the entire panoramic radiograph.  This is because each earring will show up twice.  Once, clearly in the expected location, but then again as a projection, or ghost artifact, typically in the upper posterior.

      It is the projection artifact that may not be as obvious, but it can be damaging to the diagnostic value of the radiograph.


      Chin too high or too low

      These are also probably a little more obvious for the operator.  The first shows the chin positioned too high and therefore, the occlusal plane is at too high of an angle.  

      Conversely, this patient has the chin too low such that the occlusal is pointing down.

      Addressing both of these issues comes down to making sure the occlusal plane is just slightly tipped (~10 degrees) downward.  In our experience, we often find that the chin too far up is a more common error.  One of the root causes of this is that sometimes the patient is simply nervous.  A nervous patient may have a defensive posture that is trying to keep the rest of the body “out of the machine” – which can present as the chin jutting out and up.   

      To address this issue, there is the obvious technique of raising or lowering the chinrest on your panoramic x-ray and use the laser alignment system to double check this occlusal plane angle.  However, another tip is to perform this check last before walking out of the room to initiate the scan.  


      One Parting Reminder

      There is an often-overlooked step in the workflow to capture a panoramic radiograph that can dramatically reduce the frequency all of the problems discussed above:  preparing the equipment and the software before bringing the patient over to the machine.  By doing this, it allows the operator to focus on the patient, which reduces the probability that something is missed.


      Subscribe to Receive More Great Articles

        Top 4 Applications for a Dental Panoramic X-ray in a Hospital

        While panoramic x-ray equipment is most commonly seen in dental offices, there is a growing desire by health care facilities to add the panoramic x-ray modality to their capabilities.  The main reasons for this are a combination of the panoramic x-ray’s broad diagnostic capabilities along with its dramatically lower cost and lower radiation exposure relative to other traditional medical imaging modalities. 

        As a point of reference, the effective radiation dose of a typical panoramic x-ray is about 10 microsieverts, while a traditional medical CT may be in the range of 1000 – 10,000 microsieverts (100 to 1000 times).   It’s also worth noting that the panoramic scan takes roughly 10 seconds.

        At ImageWorks, we have helped many medical centers, hospitals, and urgent care clinics add panoramic x-ray machines, and we quickly hear how useful they are to the staff.  Here are four of the most common applications that we see them used for:


        Preoperative Surgical Evaluation

        Many surgical centers have a requirement to perform a panoramic scan before certain types of surgical procedures for which the dentition may have an effect.  For example, some facilities require a panoramic scan on a patient before brain surgery. 


        Trauma assessment

        Hospitals and emergency clinics value the ability to quickly assess patients with trauma to the head and jaw area.  Specifically, suspected fracture of the mandible, TMJ problems, or other pain in the head and jaw area.  The panoramic x-ray scan is also conducive with these types of trauma because it does not require the patient to open their mouth.


        Emergency patients with severe dental pain or infection

        Some medical facilities have found that they have patients with traditional dental conditions that have become severe enough to prompt a visit to the emergency room for treatment. 


        Dental surgery

        For some medical facilities, they have dental specialists who perform surgery on the premises.  In these cases, these specialists desire (or demand) to have a dental extaoral scan done either preoperatively or postoperatively (or both)


        Of course, there are many other applications for which the panoramic x-ray machine may be used by the medical facility or hospital.  However, in our experience, these are four very common ones that we see being performed by many of the facilities that we support.


        Subscribe to Receive More Great Articles

          My Imaging Software Is No Longer Supported….Now What?

          For better or for worse, technology marches on, and it’s no different in the dental industry.  We have seen a number of imaging software platforms announce they will no longer be supported, and many offices are looking at options.  The challenge (and the opportunity) for an office is that, with a little bit of knowledge, they may be able to save quite a bit of money by avoiding a complete overhaul of all the hardware and software in the office.  

          One of the biggest challenges that dental offices face is knowing whether things will work together.  For so many offices in this situation, they will hear high-priced imaging systems claim “nothing else will work”, while low-priced systems may claim “it will work with everything”.

          The reality is usually somewhere in the middle depending not only on what systems are currently being used, but also what your needs and expectations are.  More and more, we are hearing from dental professionals who want to understand the tradeoffs more clearly so they can determine the best price without sacrificing image quality or workflow efficiency.   

          With this goal in mind, we wanted to shed some light on some of the most common questions we hear from dental professionals so that an office can plan ahead and find the right solution for them.


          Does my imaging software need to work with my practice management software?   The communication linkage between the imaging software and the practice management software is typically referred to as “bridging”.   Typically, the bridge offers two things:

          1. The ability to open the imaging software directly from the Practice Management software, so that less clicks are required, and the patient being imaged will be automatically selected in the imaging software (i.e. no need to search for patient again in the imaging software after the patient was already looked up in the practice management system).

          2. For new patients, the patient information that is entered into the Practice Management system is automatically updated into the imaging software thereby avoiding redundant data entry for new patients.

          It’s worth mentioning that the imaging software can operate independently from the practice management system (i.e. without a bridge).  However, if they do work together, there are some workflow advantages to this.  The bridge will make the user feel like the practice management software and imaging software are one piece of software.  


          If I change my imaging software, what should I do with all the images that are stored in my current software? Typically, the imaging software is what stores and manages all your digital x-ray images.  If you change your imaging software, new images will be stored and managed in the new imaging software.  Assuming the new software is not able to simply connect directly with the existing database of images, typically, you have two main options for what to do with the images in your old software.

          Option one, is to simply keep a copy of the older software that you already have and use it to access the older images.  These images would also typically be archived and backed up as part of the normal IT best practices.   With this approach, there is usually a short period where comparing images taken at different times for a patient would require referring to different software. However, after a short period, the need to refer to older images becomes less and less frequent.

          Option two applies if both the old software platform and the new software platform are compatible.  If they are, the images may be able to be “migrated” to the new software so that the old images would be available in the same place as the new images.  Typically, if migrating is possible between the two software platforms, it would be a separate service that may have an additional charge.


          Will my current sensors work with my new imaging software? Frequently, the answer to this question depends not only on the system you are using, but also on what’s important to you. Typically, plugging a sensor into a PC that uses another imaging software results in one of three common scenarios:

          Scenario One:  the imaging software cannot accept the image captured by the sensor.  The sensor will not work with the software.

          Scenario Two:  the imaging software can capture the image, but the software will not offer any “capture automation” capabilities for that sensor.  For example, during a multi-image study, the user may have to click to accept each image in the software before moving to the next position.  Sometimes, the user may also have to manually rotate and place the images in the correct charting position.

          Scenario Three:  the software can capture an image and apply the same automation capabilities that its own sensor would have.

          Some offices may see Scenario Two as unacceptable, while other offices may be ok with this if they are saving money. To further complicate matters, sometimes either the imaging software or the sensor (or both) may have the potential to work together to achieve Scenario Two or Three above, but they may require additional pieces of software to do so.   In most cases, this additional software comes from the sensor provider, and is called a “driver”.  A “driver” is a generic term for a small piece of software that is provided by the hardware manufacturer to “handshake” with a larger software application (e.g. a “TWAIN” driver is a very common one).   

          If you have any questions, or would like to better understand the tradeoffs of different options, please reach out to talk to one of our specialists.


          Subscribe to Receive More Great Articles

            CBCT Case Study: Identifying Tooth Fracture

            Here’s quick case overview from Dr. Warr discussing how he used his X-era cone beam to identify a tooth fracture.

            We hope you find it useful.


            Learn more about the X-era Cone Beam System from ImageWorks


            Subscribe to Receive More Great Articles

              How the Cuspal Inclination of an Implant Can Affect Torque

              As our dental cone beam customers grow their practices with implant treatment, we have found that some dental professionals have valued a refresher on the mechanical concepts that may play a role in their implant design.

              In this short video, we provide a brief overview of how the cuspal inclination of an implant can have a dramatic effect on the forces exerted on the surrounding bone.

              We hope you find it useful.


              Learn more about Imaging Solutions from ImageWorks


              Subscribe to Receive More Great Articles

                What is a Dental Cone Beam CT Phantom, and How Do I Use It?

                In order to assure that Dental Cone Beam CTs are being used safely and effectively, almost all states require that the Dental Cone Beam equipment have a mechanism to confirm it is operating properly year after year in a dental office.  This process can be confusing for a dental office because what’s required can vary between states, and the process can vary between manufacturers.  In fact, some first-time cone beam users may not be aware there is a requirement.

                Typically, this procedure is generally referred to as “QA”, which is short for Quality Assurance.  For dental cone beam systems, this QA procedure across all manufacturers utilizes a tool referred to as the Quality Assurance, or QA, phantom.

                To shed some light on this topic, we wanted to provide answers to some commonly asked questions about keeping your system compliant.


                What is the QA phantom used for?

                The QA phantom is a component that is scanned by the dental cone beam CT, and the resulting scan of this phantom is evaluated in specific ways.  If this evaluation passes a specific set of metrics, it serves as an indication that the cone beam CT is operating correctly.  This process is typically a core piece of the quality assurance, or QA, process.


                Where do I get it?

                Most commonly, this will come from the manufacturer of the cone beam.  However, there are independent companies that also provide dental cone beam CT phantoms.


                Are they all the same?

                No.  While there are many similarities, each one typically has its own unique characteristics.  It’s also important to know that each phantom provider has a unique process to use it, including what measurements to take.  


                What does it look like?

                While they are all different, they are typically cylindrical and made of a clear resin material.  They will typically also have different layers and some specific items embedded in them.  Here are a few examples:


                I have a technician who services my office and my unit. Does my staff really need to know how to use this phantom?

                It depends.  Some states require the office to perform the QA tests periodically (using the phantom), and sometimes an inspector will want to see evidence that this has been happening.  As an aside, performing this check is typically not that hard, and can be done fairly quickly.


                How do I use the phantom?

                This procedure on how to use it will come from the manufacturer, and the procedure is most commonly detailed in the User’s Manual.  While phantoms vary, there are some similarities.  Typically, it involves placing the phantom in the field of the view of the unit and taking a scan.  Then the QA process involves performing a number of simple measurements on the resulting image using the software.

                These measurements will be looking at spatial accuracy, noise levels, contrast resolution, slice thickness and other parameters.  


                I have a Dental Cone Beam and I don’t know where my QA phantom is.

                You are not alone.  This is unfortunately an all too common occurrence as sometimes these items get lost in the office over time.  It’s highly recommended to designate a place to store this (and other maintenance accessories for the cone beam) and then inform the entire staff of this location. 


                Learn more about Imaging Solutions from ImageWorks


                Subscribe to Receive More Great Articles

                  Would Implant Case Acceptance Increase If I Absorbed the Cost of the Initial Dental Cone Beam Scan?

                  I Place Implants, and I Outsource My CBCTs.  Would I See Higher Acceptance If I Absorbed the Initial CBCT Cost?

                  For most dental implant cases, one of the first steps is to perform an initial CBCT scan.  For those offices that do not have a CBCT in their office, this scan has a direct cost.  Depending on where the patient is scanned, the scanning facility may charge as little as $150 or as much as $300.  Charges for radiologist reviews may increase this charge further.

                  To cover this cost, most offices simply have the patient arrange the scan with the scanning facility, which the patient pays for directly out of pocket.  In many cases, they may tell the patient this cost will be “included” if they decide to move forward with the implant treatment.  This is a reasonable way to make sure the cost is covered.  Furthermore, many doctors see it as a valuable indicator to determine how committed the patient is to the treatment. 

                  However, some offices take the perspective that this initial CBCT payment may be serving as a hurdle that prevents many patients from even considering the procedure.  These offices take a different approach, and remove this barrier by agreeing to absorb this cost – independent of whether the patient decides to move forward with the full treatment plan.

                  With all the dental offices that utilized our digital imaging solutions, we have found that the latter approach is less common.  However, if done well, we have seen it be very effective in bringing implant treatment to more patients than would consider it otherwise.  One of the biggest benefits of this approach is that the CBCT arms the dental professional with a really powerful graphic to make the case to the patient how the treatment plan will improve their life.  These dental professionals prefer to remove barriers because once they have the cone beam scan, the patients can see the value for themselves.

                  However, this approach does come with risk.  It would be foolish and irresponsible to encourage patients to have CT scans performed when they will not accept the treatment.  So how is an office to decide the right strategy?

                  For those that are considering taking this approach, our recommendation is to run an experiment. 

                  As with any good experiment, it’s important to test the variable you are focused on and keep all other variables the same.  In this case, if you pick a reasonable time period — perhaps 3 months — then simply compare case acceptance during this period when patients are told that the initial scan is no charge to the acceptance rate when patient is told they will play for their scans.

                  Once this data is captured, it’s simple math.  The key datapoint is to evaluate how many more cases get accepted – and whether this additional income pays for the added costs of paying for scans on patients that do not move forward.  In this case, we will assume that in the standard operating procedure, the true cost does not change for patients that move forward with treatment – because in those cases the costs were absorbed in the broader treatment price.  

                  Here’s an example.  Let’s say that under normal operation (patient pays for their initial scan), the acceptance rate is 60%.  Let’s say that for this office that does implants, but not an enormous volume, they traditionally did 3 per month.

                  They then perform an experiment for 3 months, in which they offer to absorb the initial scan.  Let’s say that at the end of the three months, they find that they had 11 cases move forward on 15 recommendations, or an acceptance of 72%.

                  An increased acceptance is a good thing, but is this approach worthwhile?  We can’t be sure until we compare income vs. costs.

                  Let’s assume the cost of that initial scan is $300 and the incremental income for the implant case is $2000.  If we typically present the treatment to 15 patients in every 3 month period, then according to our experiment, changing our approach would result in about two additional cases every three months.   This means that:


                  Additional Cost:

                  Scans paid for patients that do not pursue treatment: 4

                  Cost per scan:  $300

                  Total Additional Cost:  $1200


                  Additional Income:

                  Additional Cases: 2

                  Income per case: $2000

                  Total Additional Income:  $4000


                  In this example, (assuming no other factors), it would be worth changing the policy to not charge the patients for that initial scan.

                  Of course, as with any calculation, the analysis is only as good as the inputs.  In addition, it should never be done in a vacuum without considering other soft factors.  For instance, perhaps there are other indicators that experience of the staff influence decisions about probability for case acceptance.  However, hopefully this provides on frameworks to decide if this approach makes sense for your practice. 


                  Learn more about Imaging Solutions from ImageWorks


                  Subscribe to Receive More Great Articles

                    Overview of Skull Anatomy For Dental Cone Beam Users


                    This is a video that many of our dental professionals have pointed to as being a nice overview of some critical anatomy of the skull.  Particularly, we have heard that it’s a great refresher for those dental professionals diving deeper into dental cone beam imaging. 
                    We wanted to share it with you.


                    Learn more about Imaging Solutions from ImageWorks


                    Subscribe to Receive More Great Articles